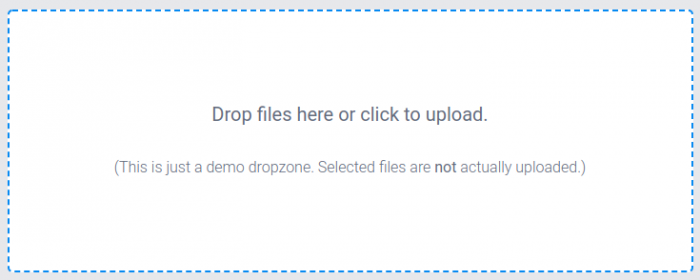
Dropzonejs를 이용한 Drag & Drop 파일 업로드 구현
Dropzonejs를 이용해 Drag & Drop 파일 업로드 기능을 구현했다. form 페이지에서 업로드 이미지를 추가하고 submit 버튼을 클릭했을 때 서버로 이미지 파일이 업로드되도록 했고 추가된 이미지 파일을 삭제했을 때 서버에 저장된 이미지도 삭제되도록 기능을 구현했다. 스크립트 코드 중 일부는 jQuery를 이용하기 때문에 함께 로드되어야 한다.
<form name="fname">
<label for="fld">필드</label>
<input type="text" name="fld" id="fld" value="">

<div class="dropzone" id="fileDropzone"></div>

</form>
form은 위와 같이 추가적인 input 필드와 dropzone이 포함되어 있다. Dropzonejs 사용을 위해 스크립트 파일을 로드한다.
<script src="./js/dropzone.js"></script>Dropzonejs 실행을 위한 설정 등은 아래의 코드로 한다. 업로드 파일은 최대 2개, 이미지 파일만 업로드 하도록 설정했다. 서버의 파일도 삭제하기 위해 removefile 을 새로 설정했다. 업로드 이미지 파일이 없을 때도 form submit을 위해 getQueuedFiles() 를 이용해 처리했다.
<script>
Dropzone.options.fileDropzone = {
    url: './fileUpload.php',
    autoProcessQueue: false,
    uploadMultiple: true,
    parallelUploads: 2,
    maxFiles: 2,
    maxFilesize: 1,
    acceptedFiles: 'image/*',
    addRemoveLinks: true,
    removedfile: function(file) {
        var srvFile = $(file._removeLink).data("srvFile");

        $.ajax({
            type: 'POST',
            async: false,
            cache: false,
            url: './fileDelete.php',
            data: { file: srvFile }
        });

        var _ref;
        (_ref = file.previewElement) != null ? _ref.parentNode.removeChild(file.previewElement) : void 0;

        setFilesName();
        return;
    },
    init: function() {
        var fileDropzone = this;

        // Uploaded images

        // First change the button to actually tell Dropzone to process the queue.
        document.querySelector("button[type=submit]").addEventListener("click", function(e) {
            // Make sure that the form isn't actually being sent.
            e.preventDefault();
            e.stopPropagation();

            // Form check
            if(checkForm()) {
                if (fileDropzone.getQueuedFiles().length > 0) {
                    fileDropzone.processQueue();
                } else {
                    setFilesName();
                    submitForm();
                }
            }
        });

        // Append all the additional input data of your form here!
        this.on("sending", function(file, xhr, formData) {
            formData.append("token", $("input[name=token]").val());
        });

        // Listen to the sendingmultiple event. In this case, it's the sendingmultiple event instead
        // of the sending event because uploadMultiple is set to true.
        this.on("sendingmultiple", function() {
            // Gets triggered when the form is actually being sent.
            // Hide the success button or the complete form.
        });

        this.on("successmultiple", function(files, response) {
            // Gets triggered when the files have successfully been sent.
            // Redirect user or notify of success.
            var obj = JSON.parse(response);
            for(i=0; i<files.length; i++) {
                $(files[i]._removeLink).data('srvFile', obj[files[i].name]);
            }

            setFilesName();

            // form submit
            submitForm();
        });

        this.on("errormultiple", function(files, response) {
            // Gets triggered when there was an error sending the files.
            // Maybe show form again, and notify user of error
        });
    }
};
</script>
서버 업로드 파일 처리를 위한 Class는 아래와 같다.
<?php
/**
 * File Upload class
 */

class FILEUPLOAD
{
    protected $dest;
    protected $ext;
    protected $chunkTime;

    public function __construct()
    {
        if(!is_writable(FILES_PATH))
            throw new \Exception('Unable to write');

        $dest = FILES_PATH.DIRECTORY_SEPARATOR.'tmp';
        if(!is_dir($dest)) {
            mkdir($dest, 0755);
            chmod($dest, 0755);
        }

        $this->dest = $dest;
        $this->ext  = array( 1 => 'gif', 2 => 'jpg', 3 => 'png');
        $this->chunkTime = 86400 * 2;
    }

    public function fileName()
    {
        list($usec) = explode(' ', microtime());
        $usec = preg_replace('#[^0-9]#', '', $usec);

        return md5(date('YmdHis', time()).$usec);
    }

    public function chunkDelete()
    {
        foreach (scandir($this->dest) as $c) {
            if ($c == '.' || $c == '..')
                continue;

            $f = $this->dest . DIRECTORY_SEPARATOR . $c;

            if (is_dir($f))
                rmdir($f);

            if (time() - filemtime($f) > $this->chunkTime)
                unlink($f);
        }
    }

    public function upload()
    {
        $result = array();

        // chunk delete
        $this->chunkDelete();

        $cnt = count($_FILES['file']['name']);

        for ($i = 0; $i < $cnt; $i++) {
            $file = $_FILES['file']['tmp_name'][$i];

            if ($file) {
                $size = getimagesize($file);

                if ($size[2] >= 1 && $size[2] <= 3) {
                    while (1) {
                        $name = $this->fileName();
                        $dest = $this->dest.DIRECTORY_SEPARATOR.$name.'.'.$this->ext[$size[2]];

                        if(is_file($dest)) {
                            usleep(10);
                            continue;
                        }

                        break;
                    }

                    move_uploaded_file($file, $dest);
                    $result[$_FILES['file']['name'][$i]] = str_replace(NT_FILES_PATH, '', $dest);
                }
            }
        }

        return $result;
    }
}
업로드 파일 처리를 위한 fileUpload.php 파일은 아래와 같다.
<?php
define('FILES_PATH', __DIR__.'/files');

$result = array();

if (!empty($_FILES)) {
    $file = new FILEUPLOAD();

    $result = $file->upload();
}

die(json_encode($result));
업로드 파일 삭제를 위한 fileDelete.php 파일은 아래와 같다.
<?php
define('FILES_PATH', __DIR__.'/files');

$file = $_POST['file'];

if ($file) {
    $path = FILES_PATH.$file;

    if (is_file($path))
        unlink($path);
}
파일 삭제의 경우 파일명만 알면 삭제가 되기 때문에 추가적인 보안조치가 있어야 한다.
추가 내용으로 서버에 업로드된 파일의 썸네일을 Dropzone 에 표시되게 하려면 아래와 같은 코드가 Dropzonjs 설정 스크립트 코드 중 // Uploaded images 다음에 추가하면 된다.
var mockFile;
var fileCount = 0;
$.getJSON("./getFiles.php", function(data) {
    $.each(data, function(key, value) {
        mockFile = { name: value.name, size: value.size };
        fileDropzone.emit("addedfile", mockFile);
        fileDropzone.emit("thumbnail", mockFile, value.data);
        fileDropzone.emit("complete", mockFile);

        $(mockFile._removeLink).data("srvFile", value.path);
        fileCount++;
    });

    fileDropzone.options.maxFiles = fileDropzone.options.maxFiles - fileCount;
});
getFiles.php 파일의 아래와 같다.
<?php
define('FILES_PATH', __DIR__.'/files);
$files = array();

for($i = 1; $i <= 2; $i++) {
    if ($row['file'.$i]) {
        $file = FILES_PATH.$row['file'.$i];

        if (is_file($file)) {
            $size = filesize($file);
            $name = basename($file);
            $path = str_replace(FILES_PATH, '', $file);
            $mime = mime_content_type($file);
            $data = 'data:'.$mime.';base64,'.base64_encode(file_get_contents($file));

            $files[] = array(
                'name' => $name,
                'size' => $size,
                'path' => $path,
                'data' => $data
            );
        }
    }
}

die(json_encode($files));
서버에 업로드된 이미지의 사이즈가 큰 경우 썸네일이 정상적으로 표시되지 않을 수 있는데 이 때는 css 코드를 이용해 썸네일 사이즈를 지정해준다.
.dz-image img {width: 120px; height: 120px}
자료찾다 sir에서 뵙던 편리님을 여기서 뵙네요..
많은도움 받아갑니다.. ^^
방문해 주셔서 감사합니다. 멋진 하루되세요!